This post will continue guiding you on how to use Azure Portal to deploy the necessary infrastructure components related to virtual machine scale sets (VMSS).
The primary milestones for the whole configuration will be:
1. Create a new master VM for image prototype
2. Take snapshot from the master VM
3. Create disk from the snapshot
4. Create VM from the disk
5. Generalize VM to shared image gallery
6. Deploy VMSS from shared image gallery
7. Associate VMSS to load balancer
8. Create a new VM from image gallery for prepare VMSS image version update
9. Update VMSS image version
I have covered step 1-5 in the previous blogs, you can read through the details before jumping to this blog for the previous steps.
In this blog, I will focus on milestone 6 to 7, and will wrap up the last step in the next post.
Let’s start from step 6.
Step 6 – Deploy VMSS from shared image gallery
| Steps | Procedures |
| 1 | Navigate to VM image definitions -> Select Target definition |
| 2 | Under Overview, click “Create VMSS”  |
| 3 | Following the below setting and define the Subscription, Resource Group, VMSS name, Size, Username, Password, then click “Next” 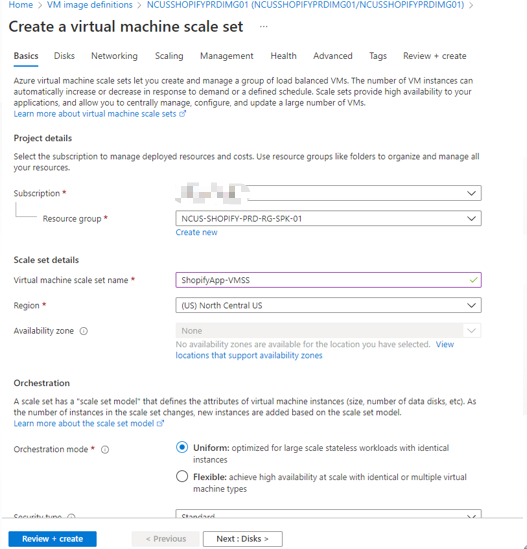 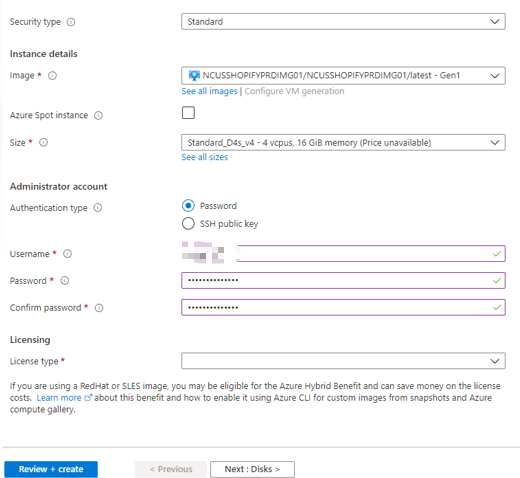 |
| 4 | Define the OS disk type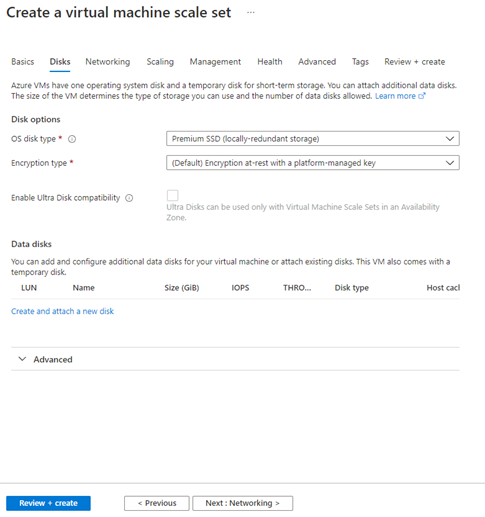 |
| 5 | Select the target Virtual Network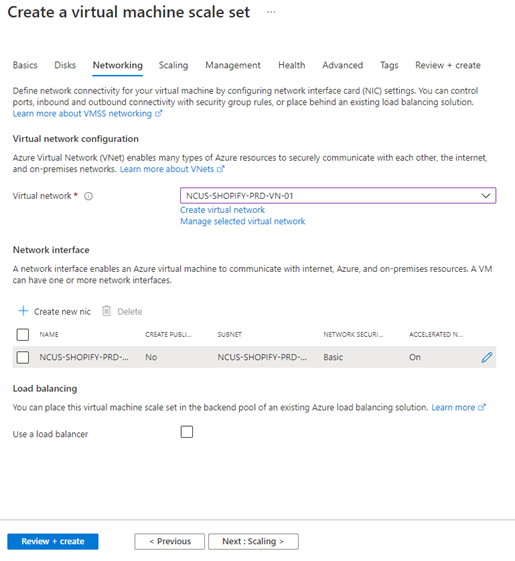 |
| 6 | Edit the network interface setting, then select “OK” 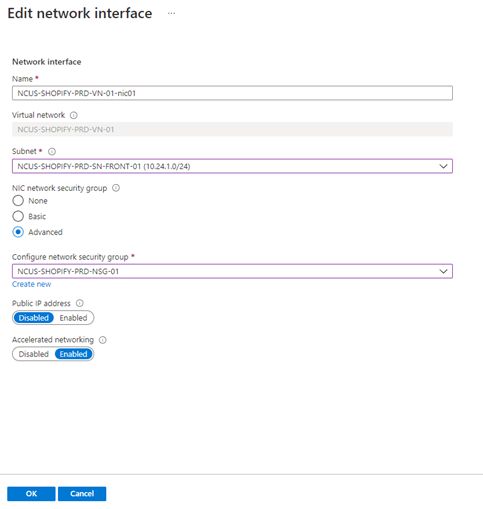 You can specify whether the each VMSS instance need specific public IP, it should be more easy to access the specific VMSS instance from public network. You can specify whether the each VMSS instance need specific public IP, it should be more easy to access the specific VMSS instance from public network. |
| 7 | Define the VMSS scaling policy, then click “Next” 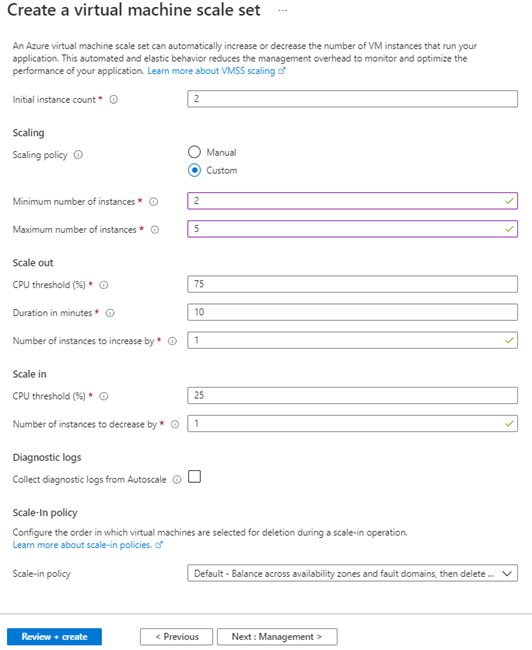 |
| 8 | Follow the below setting, then click “Next” 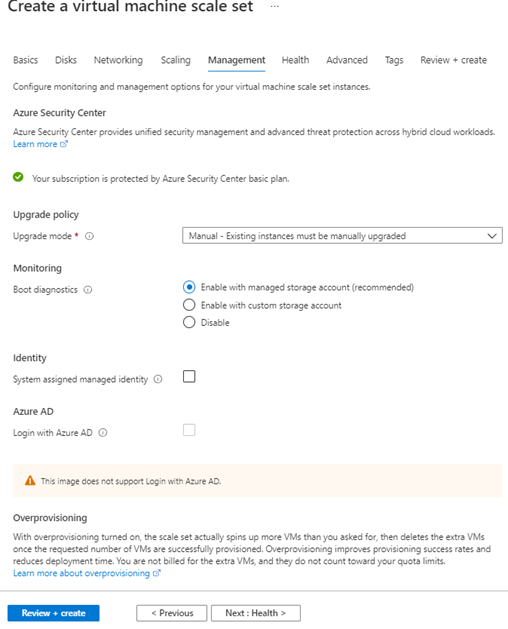 |
| 9 | You can use the default setting or can specify application insight to monitor your specific application within the VMSS. 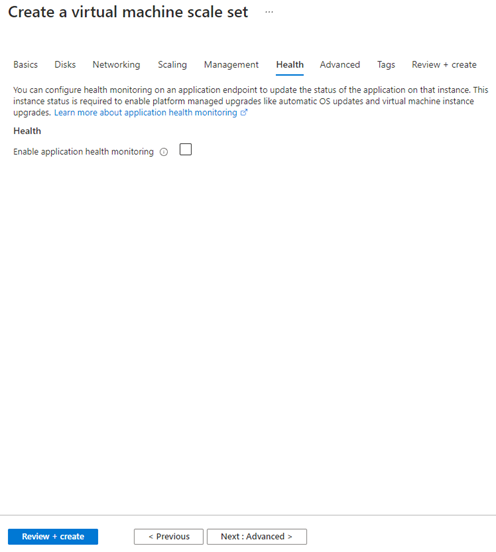 |
| 10 | Follow the below setting, then click “Next” 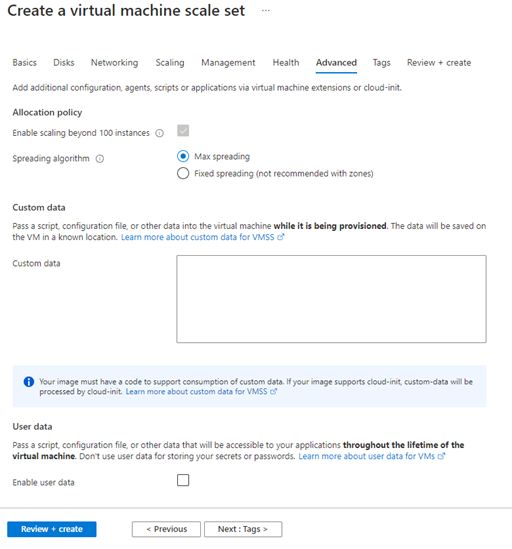 |
| 11 | You can edit the tagging for easy management 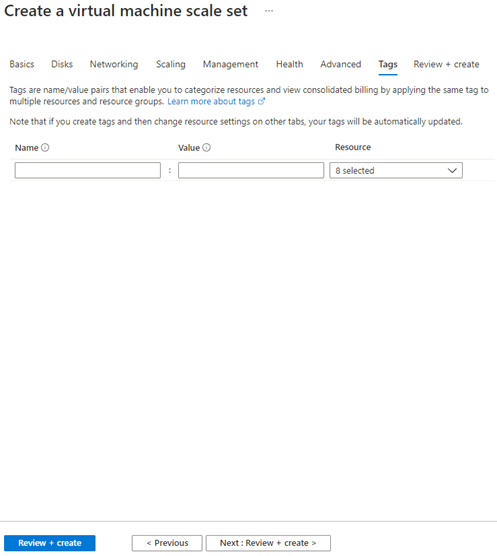 |
| 12 | Click “Create”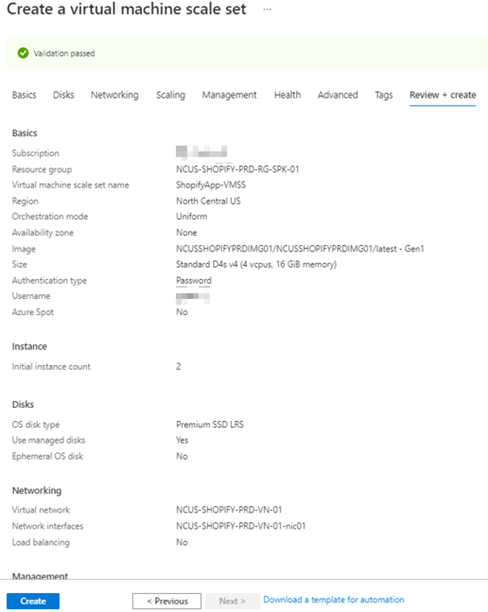 |
After the “create” button, the VMSS will be deployed, now you need to associate the VMSS to the load balancer.
Step 7 – Associate VMSS to load balancer
| Steps | Procedures |
| 1 | Navigate to Load Balancer -> Select Target LB to be associated |
| 2 | Select Backend Pools -> choose existing backend pool or create new 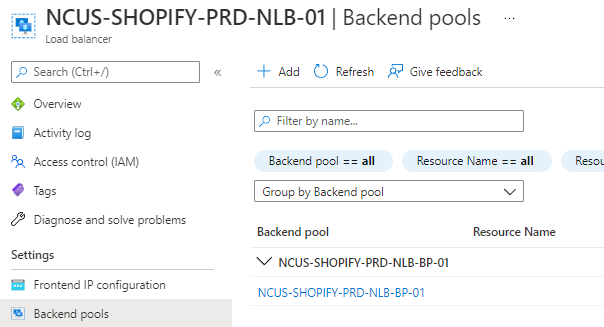 |
| 3 | Under Virtual Machine Scale Set, Select the target VMSS 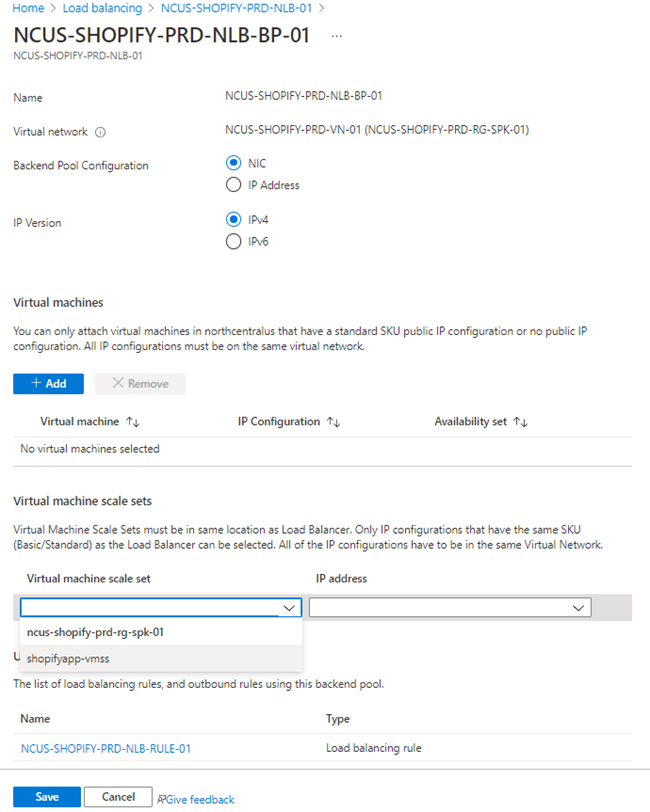 |
| 4 | Click “Save” 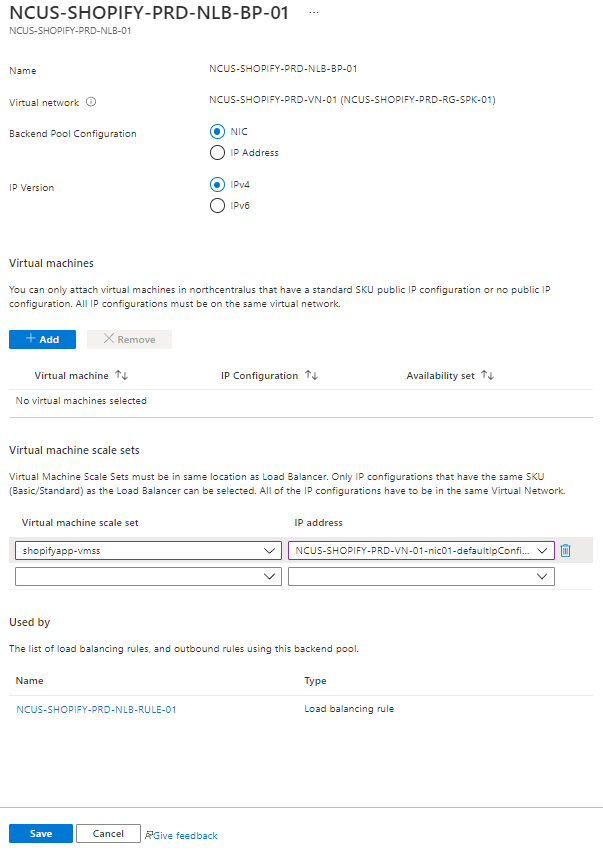 |
| 5 | Upgrade the instance status by clicking the blue colour area  |
| 6 | Select all the instance and click “Upgrade”, then “Yes”   |
| 7 | Verify the last column “Latest Model” should be display “Yes”  |
| 8 | Go back to LB and refresh, the instances should be displayed in the backend pool. 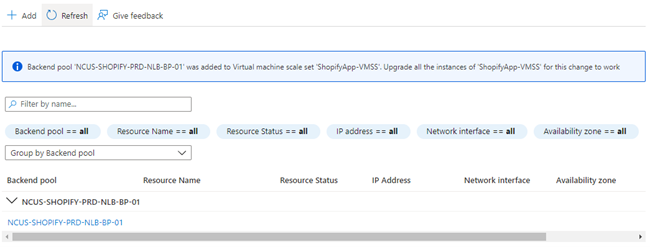 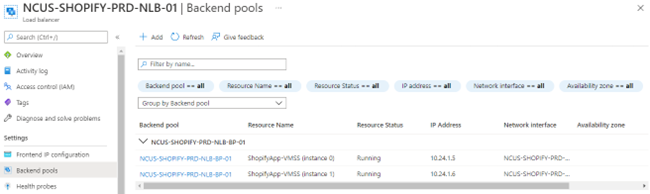 |
The above instruction is part of the main procedures for the VMSS infrastructure deployment in Azure Portal. I will continue step 8 in the next blog. Please stay tuned.
To learn more about the service and various features, refer to the VMSS documentation.
Virtual Machine Scale Sets documentation – Azure Virtual Machine Scale Sets | Microsoft Docs
If you are interested in exploring capabilities beyond the standard offering, simply feel free to contact us at enquiry@soshk.com
Again, see you in the next blogs!
David Ko
Cloud Engineer, SOS Group Limited