This post will guide you how to use Kusto query to customize Sentinel Workbook for Sentinel Incidents for easy management.
The steps for the whole configuration will be:
- Create a new Workbook
- Develop a customized Workbook for Sentinel Incidents View
Step 1 – Create a new Workbook
Visit to “Sentinel” and select “Workbook”, then click “Add workbook” to create a blank workbook.
Step 2 – Develop a customized Workbook for Sentinel Incidents View
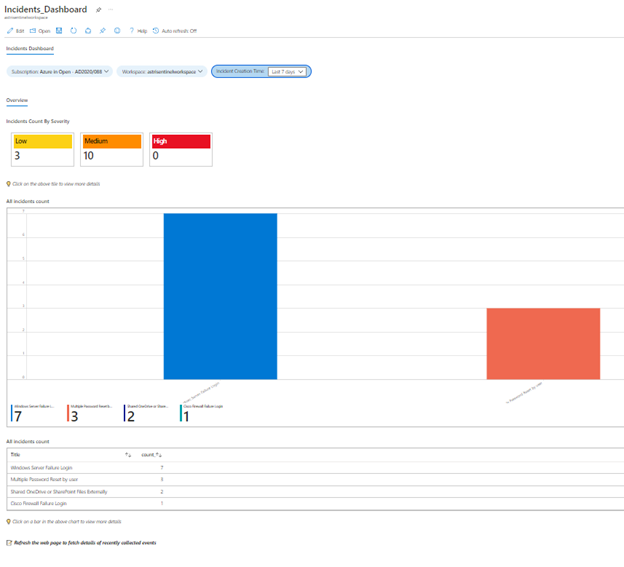
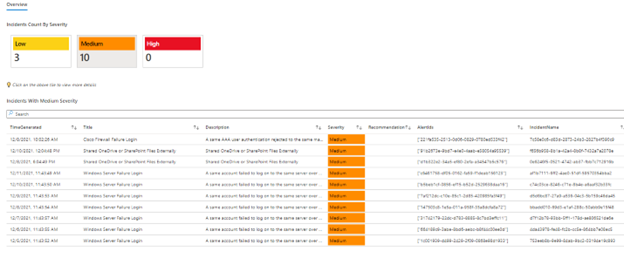
For the Sentinel Workbook, you can make the dashboard like our example.
Back to the topic, how to make it?
Most of the things need to be done by using Kusto Query (KQL) in Sentinel Workbook, you can define an overview Kanban first.
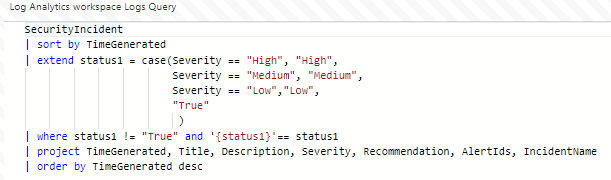
In this example, we are using datable for list-out the severity for each incident or event:
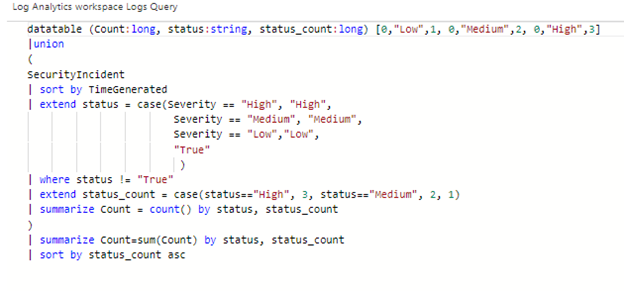
By using the above query, you will see the result as below:
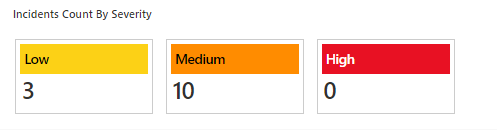
You can also define the hidden item and once the user click for the targeted place, the hidden item will be displayed, in this example, if you want to make that when the user click for the one of the “Severity Box”, the detailed information related to that severity will be displayed, you can do the following configuration:
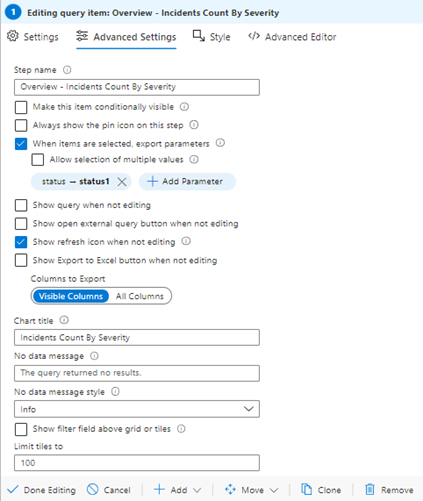
For the hidden item part, you will need to use this KQL, and make it conditional visible:
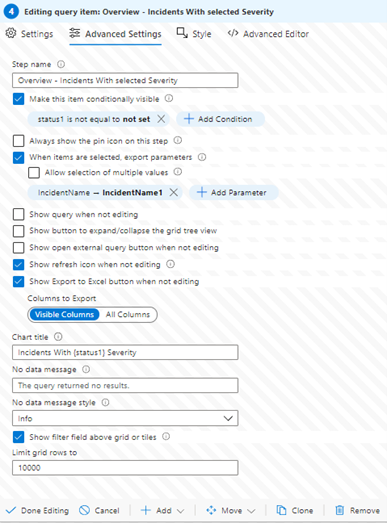
After done the above configuration, when the user selected the “Box”, the hidden item will be shown.
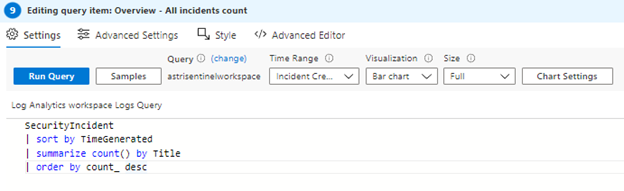
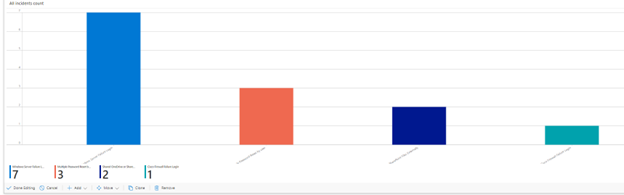
If you want to make a chart, you just simply click for the “Visualization” during editing:
You can visit our SOS GitHub for downloading the source code as a template:https://github.com/SOSHKMVP/AzureSentinel-Workbook/blob/main/Incidents_Dashboard.txt
Eric Chan
Microsoft MVP
SOS Group Limited